



 Cadillac Escalade: Removing the Spare Tire and Tools
The equipment needed to change a flat tire is stored under the storage tray, located on the driver side trim panel, over the rear wheelhouse.
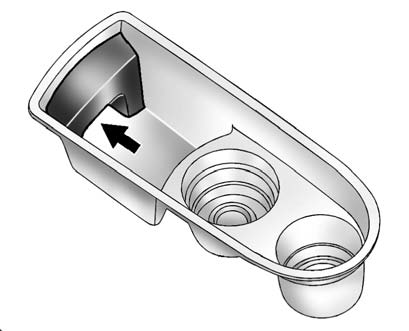
Regular Wheelbase Shown, Extended Wheelbase Similar.
1. Remove the tray to access the tools by pulling up on the finger depression under the jack symbol.
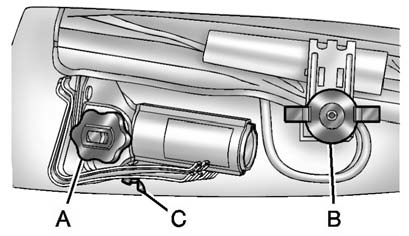
A. Jack Knob
B. Wing Nut Retaining the Tool Bag
C. Wing Nut Retaining the Wheel Blocks
2. Turn the wing nut retaining the tool bag (B) counterclockwise to remove it.
3. Turn the jack knob (A) counterclockwise to release the jack and wheel blocks from the bracket.
4. Turn the wing nut retaining the wheel blocks (C) counterclockwise to remove the wheel blocks and the wheel block retainer.
Use the following tools:
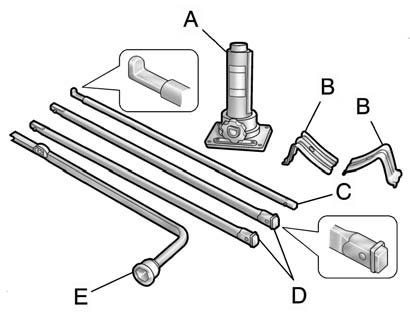
A. Jack
B. Wheel Blocks
C. Jack Handle
D. Jack Handle Extensions
E. Wheel Wrench
To access the spare tire:
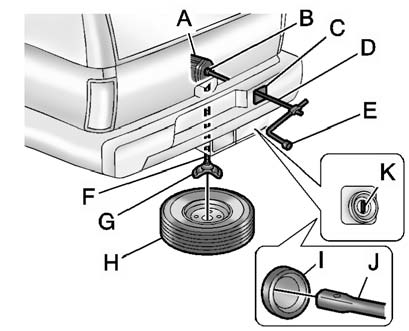
A. Hoist Assembly
B. Hoist Shaft
C. Hoist Shaft Access Cover/Hole
D. Jack Handle Extensions
E. Wheel Wrench
F. Hoist Cable
G. Tire/Wheel Retainer
H. Spare Tire (Valve Stem Pointed Down)
I. Hoist Shaft Access Hole
J. Hoist End of Extension Tool
K. Spare Tire Lock
1. To reach the hoist shaft access cover (C), remove the hitch cover by turning the two fasteners located at the bottom of the cover counterclockwise and then pull the cover down and rotate it towards you.
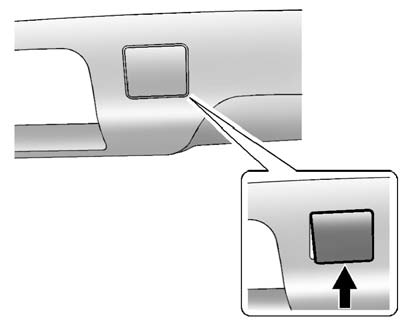
2. Open the hoist shaft access cover on the bumper to access the spare tire lock.
3. To remove the spare tire lock insert the ignition key, turn it clockwise and then pull the lock out.
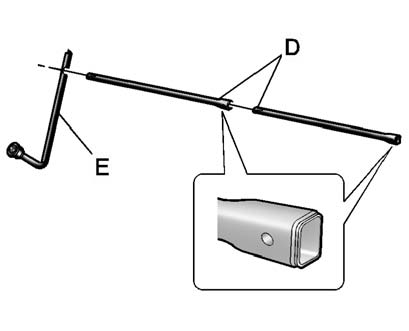
4. Assemble the two jack handle extensions (D) and wheel wrench (E), as shown.
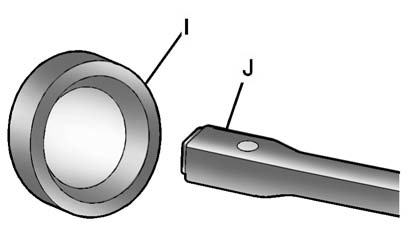
5. Insert the open end of the extension (J) through the hole in the rear bumper (I) (hoist shaft access hole).
Be sure the hoist end (J) of the extension connects to the hoist shaft. The ribbed square end of the extension is used to lower the spare tire.
6. Turn the wheel wrench counterclockwise to lower the spare tire to the ground. Continue to turn the wheel wrench until the spare tire can be pulled out from under the vehicle.
If the spare tire does not lower to the ground, the secondary latch is engaged causing the tire not to lower. See Secondary Latch System for more information.
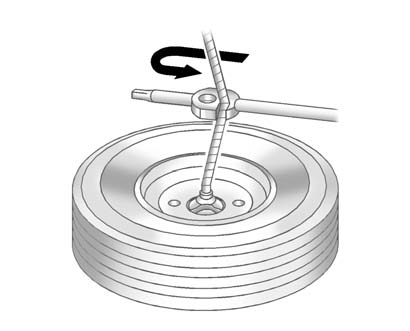
7. Use the wheel wrench hook to pull the hoist cable closer to assist in reaching the spare tire.
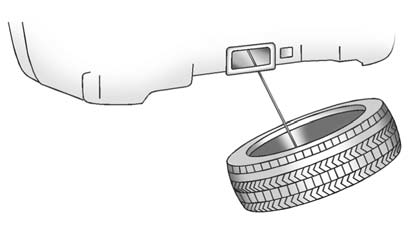
8. Tilt the tire toward the vehicle with some slack in the cable to access the tire/wheel retainer. Separate the retainer from the guide pin by sliding the retainer up the pin while pressing down on the latch.
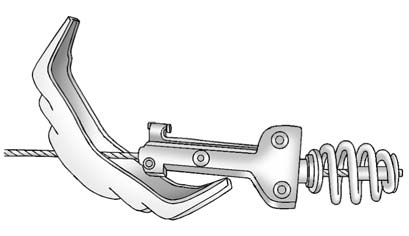
Once the retainer is separated from the pin, tilt the retainer and pull it through the center of the wheel along with the cable and latch.
9. Put the spare tire near the flat tire.
 Tire Changing
...
 Removing the Flat Tire and Installing the Spare Tire
1. Do a safety check before proceeding. See If a Tire Goes Flat
for more information.
2. To remove the center cap, place the chiseled end of the wheel wrench in the
slot on the wheel an ...
See also:
Linking intelligent key
The Climate control system settings can be
memorized for each Intelligent Key. For
more details, see “Setting memory function”
in the “3. Pre-driving checks and
adjustments” section. ...
Cargo Management System
This vehicle has a cargo management system located in the rear.
To remove the cargo management cover:
1. Open the cover. It remains open when lifted.
2. Pull the cover up making sure to unhook th ...
Mirror Adjustment
Exterior Mirrors
To adjust each mirror:
1. Press (A) or (B) to select the mirror.
2. Press the control pad to adjust the mirror.
3. Press (A) or (B) again to deselect the mirror.
Folding Mirror ...


