



 Mercedes-Benz GL-Class: Opening/closing from the outside
Opening
► Press the
 button on the SmartKey.
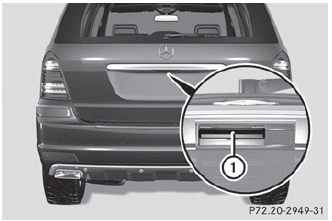
► Pull handle 1.
► Raise the tailgate.
Closing
WARNING 
To prevent possible personal injury, always
keep hands and fingers away from the cargo compartment opening when closing the
tailgate. Be especially careful when small
children are around.
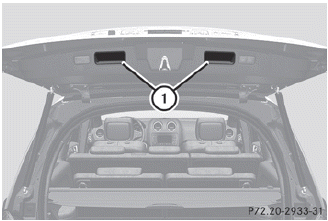
► Pull the tailgate down using recess
1.
► Push the tailgate closed from outside the
vehicle.
► If necessary, lock the vehicle with the
 button on the SmartKey or with KEYLESS-GO.
 If a KEYLESS-GO key is detected in the
cargo compartment, the tailgate will not
lock.
If a KEYLESS-GO key is detected in the
cargo compartment, the tailgate will not
lock.
 Important safety notes
Important safety notes
Do not leave the SmartKey in the cargo
compartment. You could otherwise lock
yourself out
WARNING
When leaving the vehicle, always remove the
SmartKey from the ...
 Opening/closing automatically fromoutside
Important safety notes
WARNING
Make sure the tailgate is closed when the
engine is running and while driving. Among
other dangers, deadly carbon monoxide (CO)
gases may enter vehicle ...
See also:
Troubleshooting guide
The system should respond correctly to all voice commands without difficulty.
If problems are encountered, follow the solutions given in
this guide for the appropriate error.
Where the solutions ...
Cargo net
Important safety notes
WARNING
Make sure the cargo net is properly engaged
at top and bottom position and the tightening
belts are securely fastened.
Never use a damaged cargo net.
A ...
Liftgate
WARNING
Exhaust gases can enter the vehicle if it is driven with the liftgate or trunk/hatch
open, or with any objects that pass through the seal between the body and the trunk/hatch
or liftgat ...


